
Steampunk Saturdays: Pimp My Goggles
You might remember from a couple of years ago (wow, is it really that long?) that for a while I ran a feature called 'Steampunk Saturdays', where I shared a few steampunk (or steampunk-inspired) looks, mostly put together using items I already owned. The series fizzled out after a while because I ran out of clothing that I already had which could be considered even loosely steampunk-y, but I'm very happy to say that I recently discovered that there's quite a large steampunk scene in my area and therefore I'm once again looking into becoming more involved with the subculture.
With that in mind, I am reinstating my Steampunk Saturdays feature. I will not be posting every Saturday, only when I have something new to blog about, and of course as with before this will not be replacing any of my normal vintage/retro content.
If you'd like to read any of my previous Steampunk Saturdays blog posts, you can do so here.
Without further ado, for my first post of the newly reinstated series I will be sharing a little DIY project I have just completed, working on creating a slick pair of brass goggles to add to my outfits. A pair of goggles is pretty much an essential for a lot of steampunk outfits, but the nicer and fancier designs can be quite expensive. Fortunately it's not too hard to make your own, from scratch if you're good at that sort of thing (there are tutorials online) or like I've done here using a cheap mass-produced pair as a base.
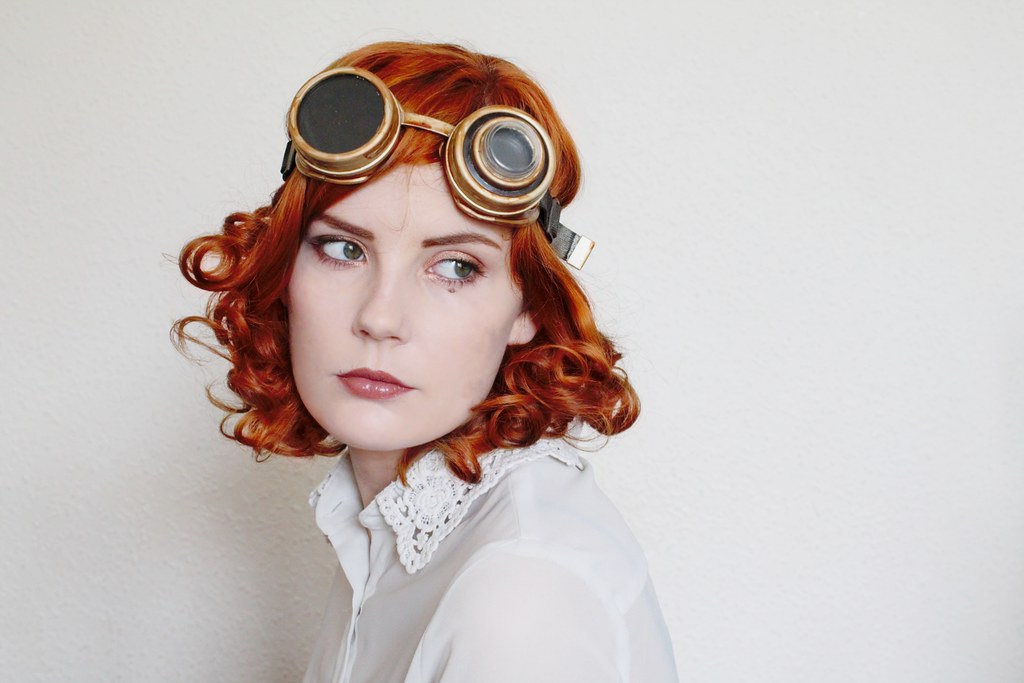
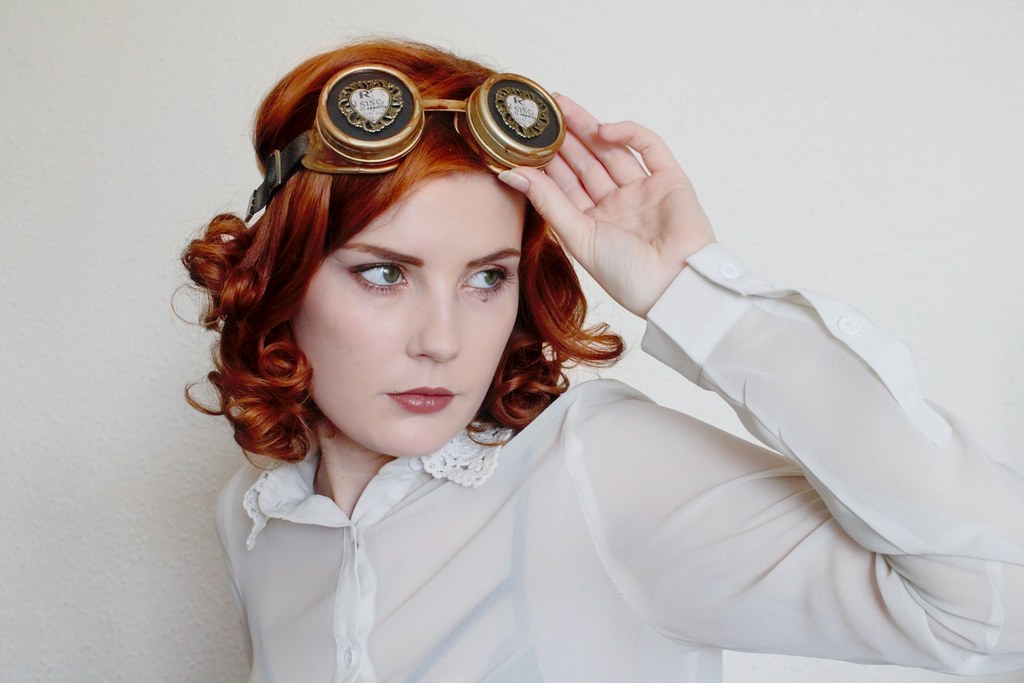
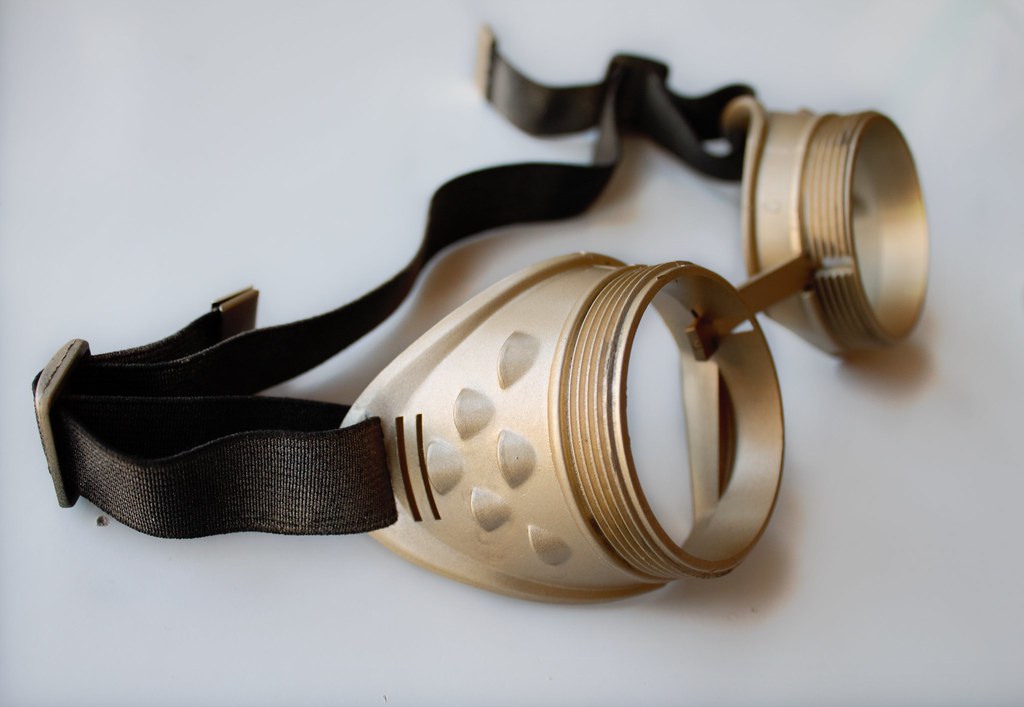
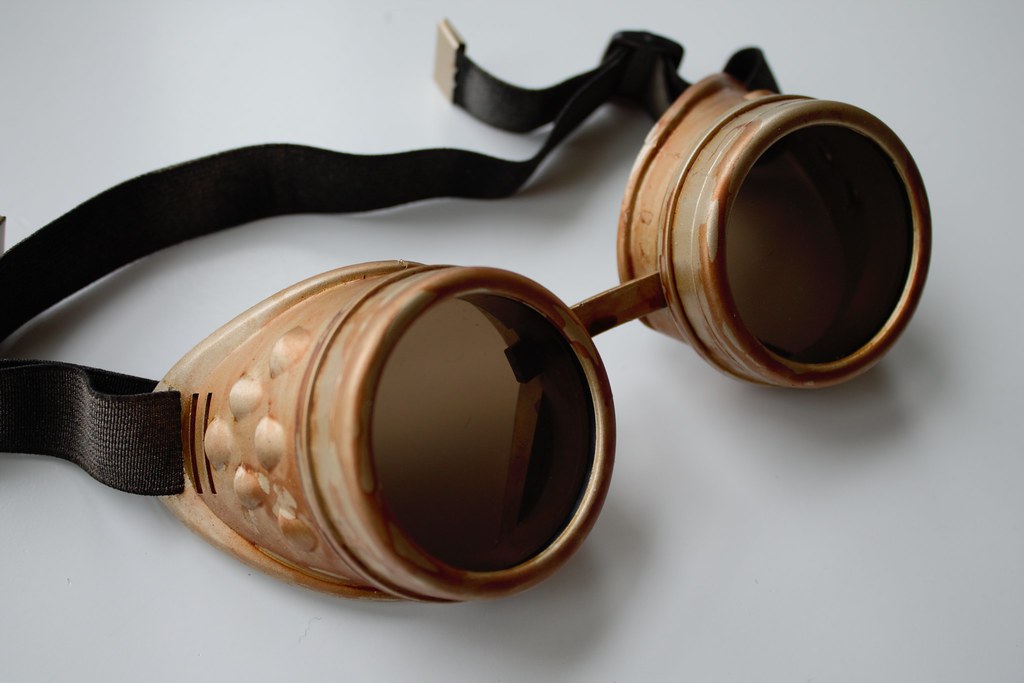
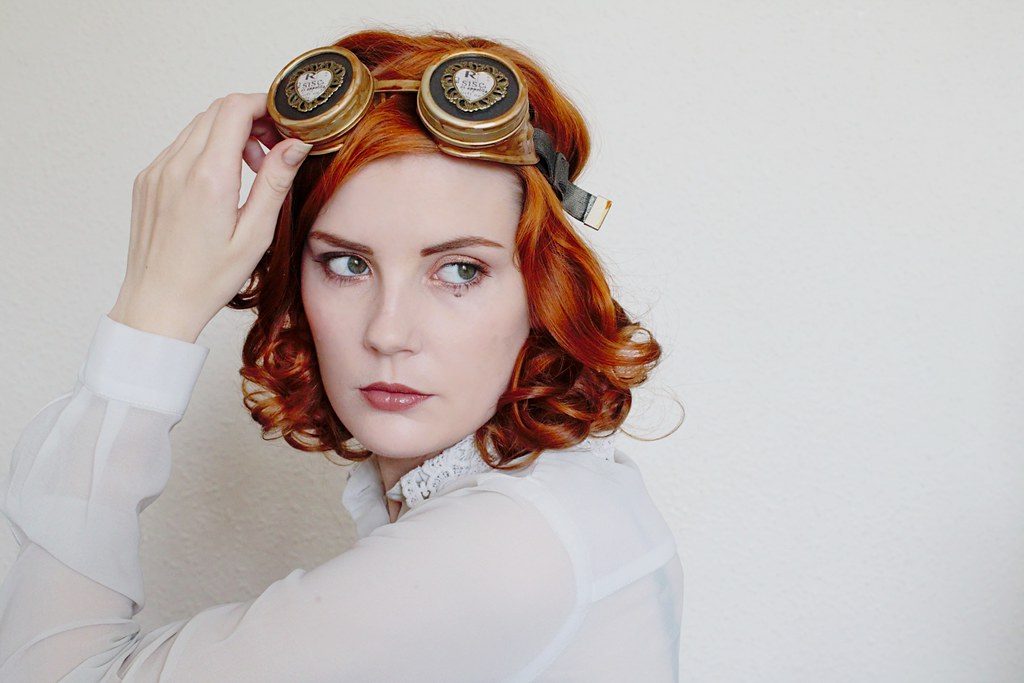
Here is the final product. The goggles have three sets of interchangeable lenses which I can swap out according to which set best matches my outfit.

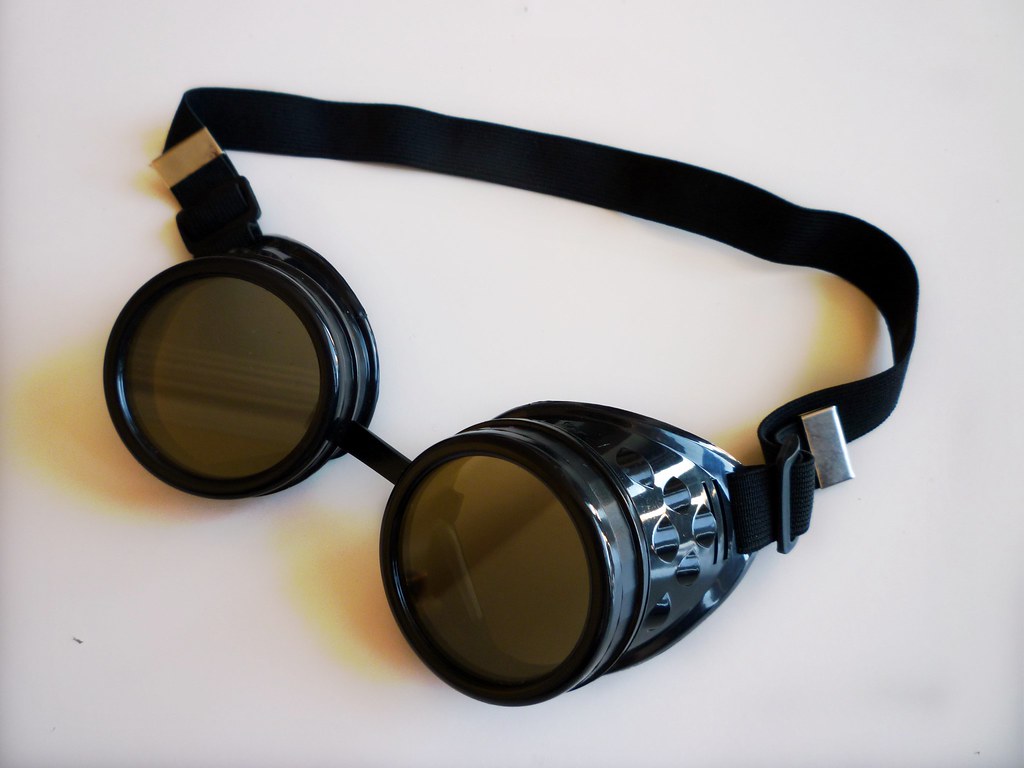
I started the process off with this pair of cheap black goggles, which I bought for £10 at Head Case Curios in Southsea. This style is readily available online and comes in a number of different colour combinations. As I wanted mine in my hands ready to go to an event, I decided against ordering them online and therefore made my choice from the stock that was available in the shop on the day I happened to go in. Starting off with a pair that was already brass-coloured would have made the process quicker, cheaper, and easier - but overall the black frame and dark lenses made for a pretty good neutral base to start from.
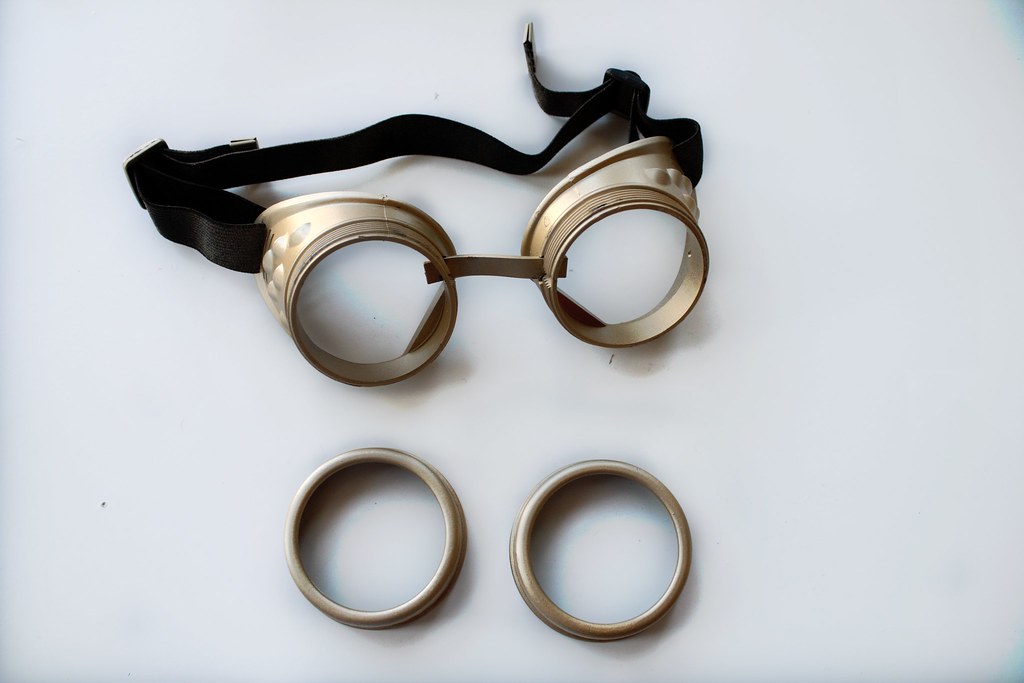
The first thing I did was to dismantle the goggles and remove the lenses in order to spray paint them gold. Unfortunately I couldn't manage to remove the strap without cutting it off, so I just left it in place. In the future I might remove it and change it for a leather strap or a ribbon, but it's fine for now. I used this gold spray paint, which was a brighter gold than the copper/brass tone I had wanted, but which did an excellent job of covering the black plastic. I used about 2-3 coats of paint (it covered well in 2 coats but I had to touch up some bits that I'd missed), and here is what the goggles looked like once they'd been sprayed:
Next, I set about making my new lenses. When I first bought the goggles I knew I wanted to do something to them to make them look less plain and generic, and when I discovered by accident that the lenses are removable (in fact it appears you can buy different lenses for them online), I decided it wouldn't be too difficult to make my own. My first idea was for a zoom lens, which I initially wanted to attach so that it would either flip up and down from the top of one of the lenses (similar to this), or for it to stand out a bit from the lens (something like this). In the end I couldn't find all the parts I needed to make either of these ideas work, but by then I had come up with the idea of making my own lenses so was able to change my plans accordingly.
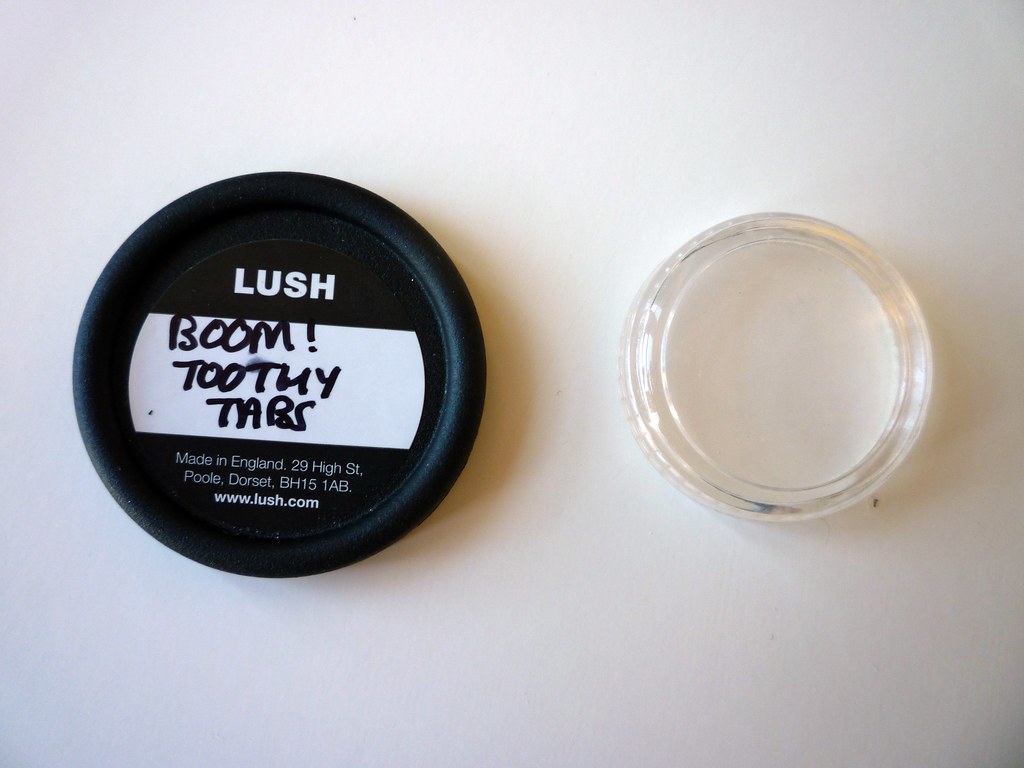
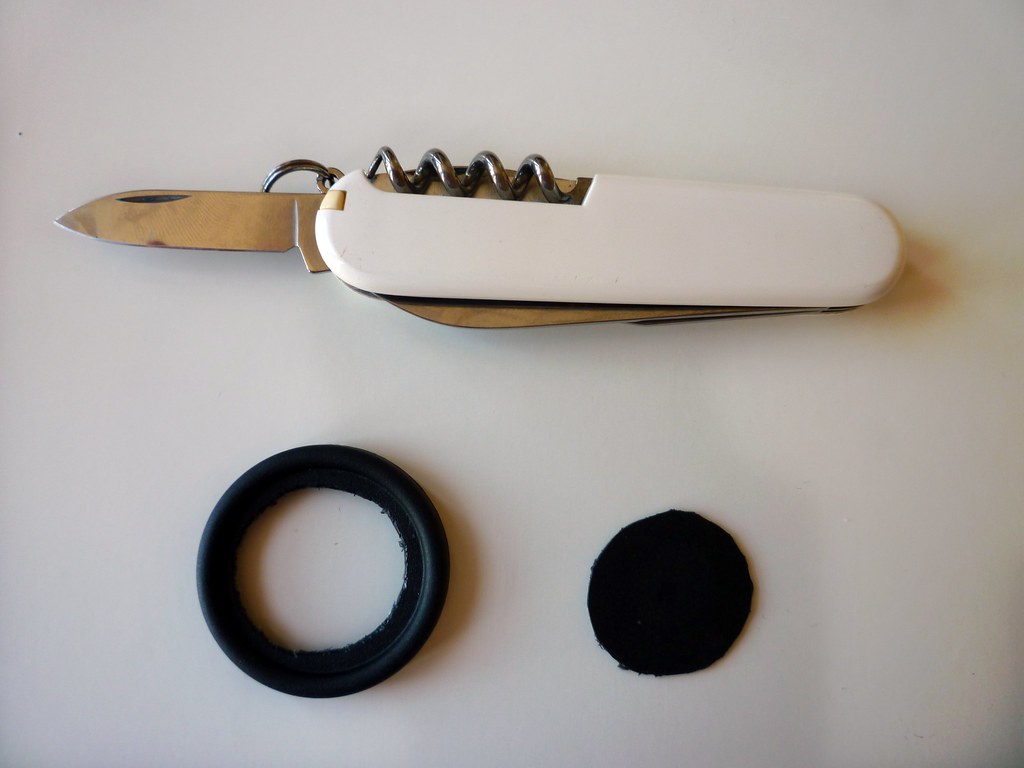
To make the zoom lens itself, I used the lid from a Lush sample container for the frame and the lid from a clear plastic loose eyeshadow container (that just happened to fit perfectly inside the rim of the other lid) for the lens. I used a pen knife to cut a hole out of the centre of the larger black lid making sure to leave a small margin to attach the clear lid to.
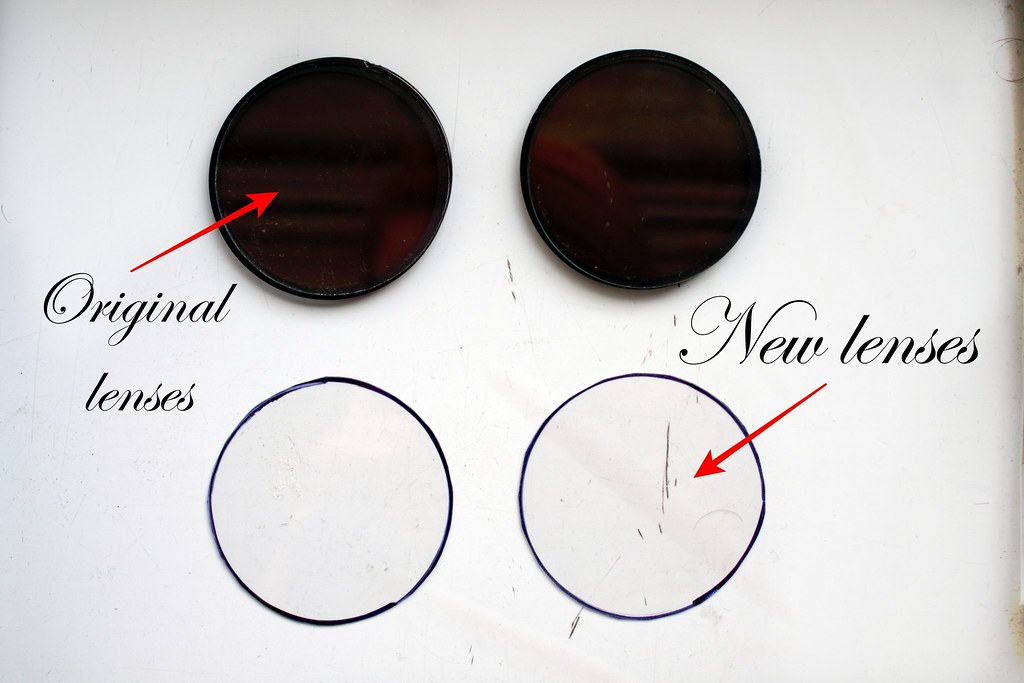
For the new large lens (to attach the zoom lens to), I traced around the original lenses from the goggles onto some clear plastic packaging and cut the lenses out.
I then left the zoom lens alone for a while because I knew I wanted to work on that a little more, and instead I assembled the other decorative lenses.
I had found these very cool and perfectly steampunk-appropriate stickers in Poundland:
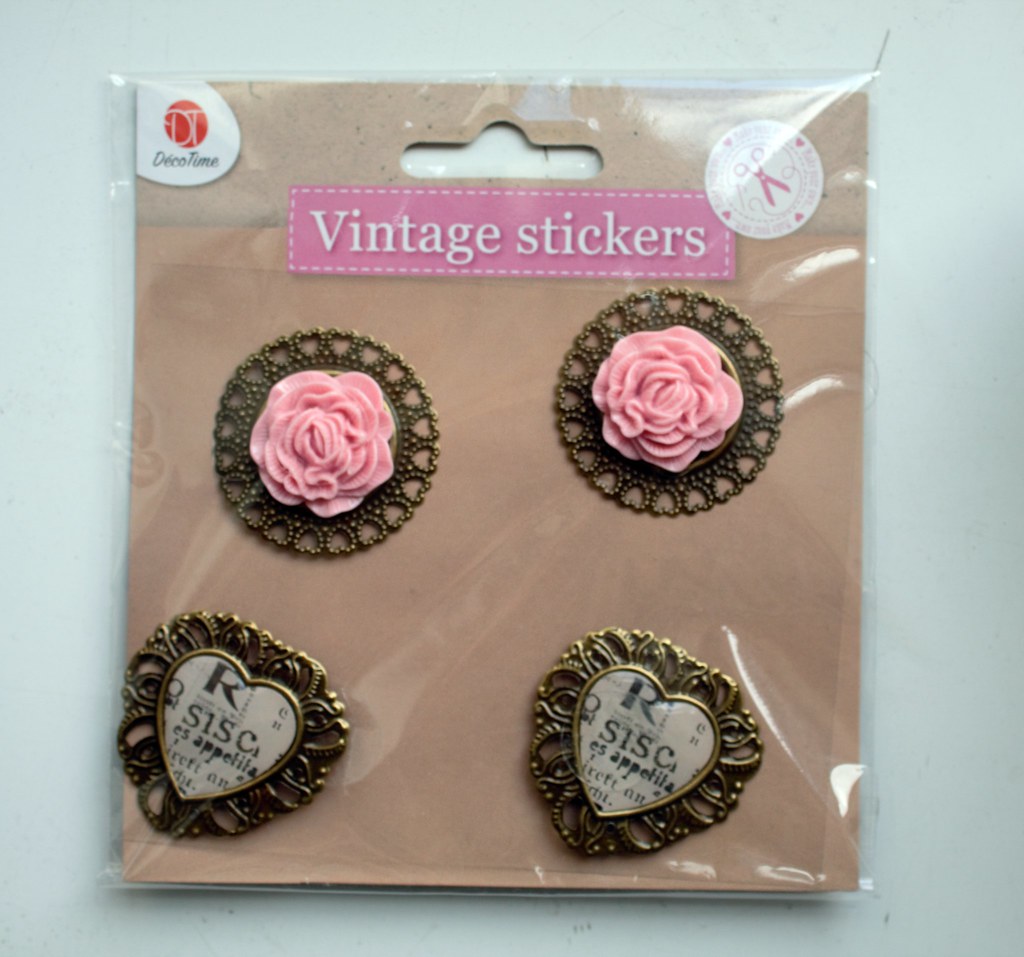
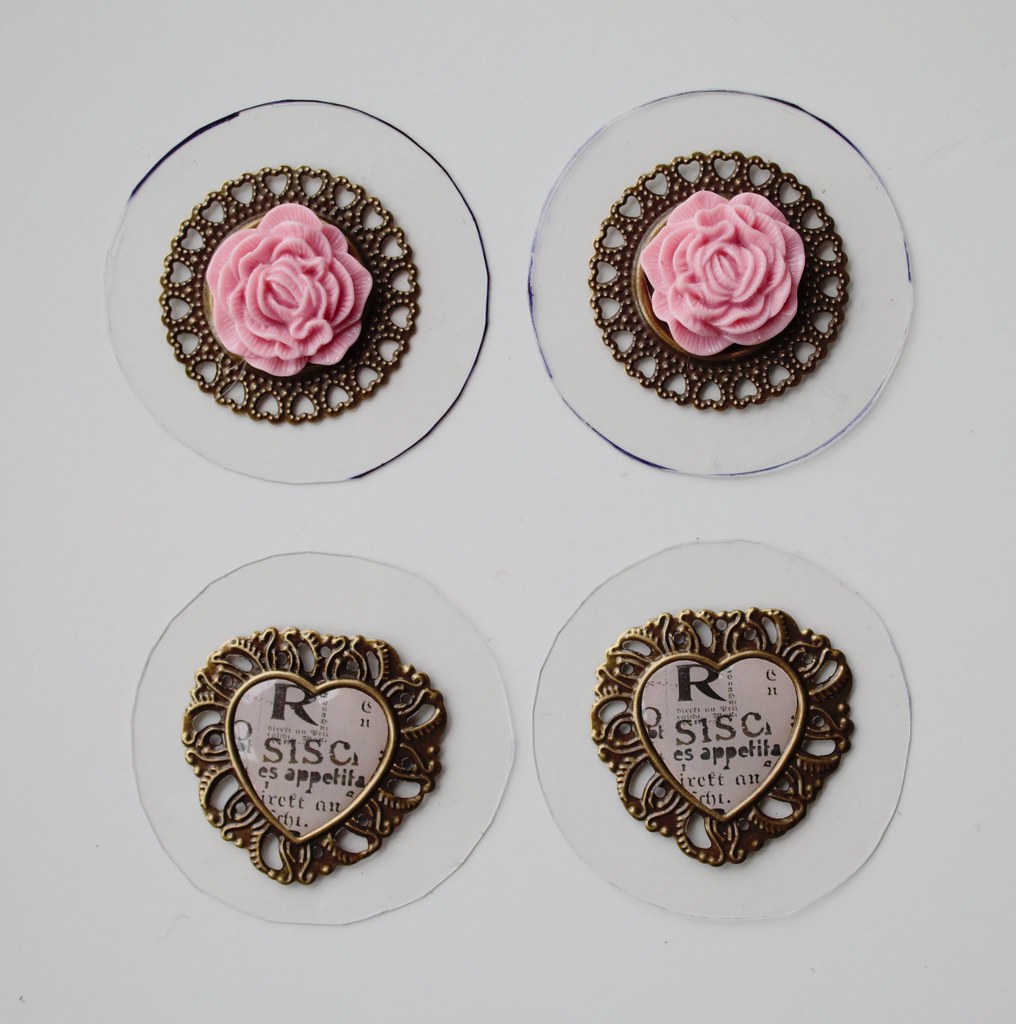
The sticky part on the back of them wasn't good enough to properly fix them onto the new lenses so I just superglued them instead. Here's what they look like all glued together:
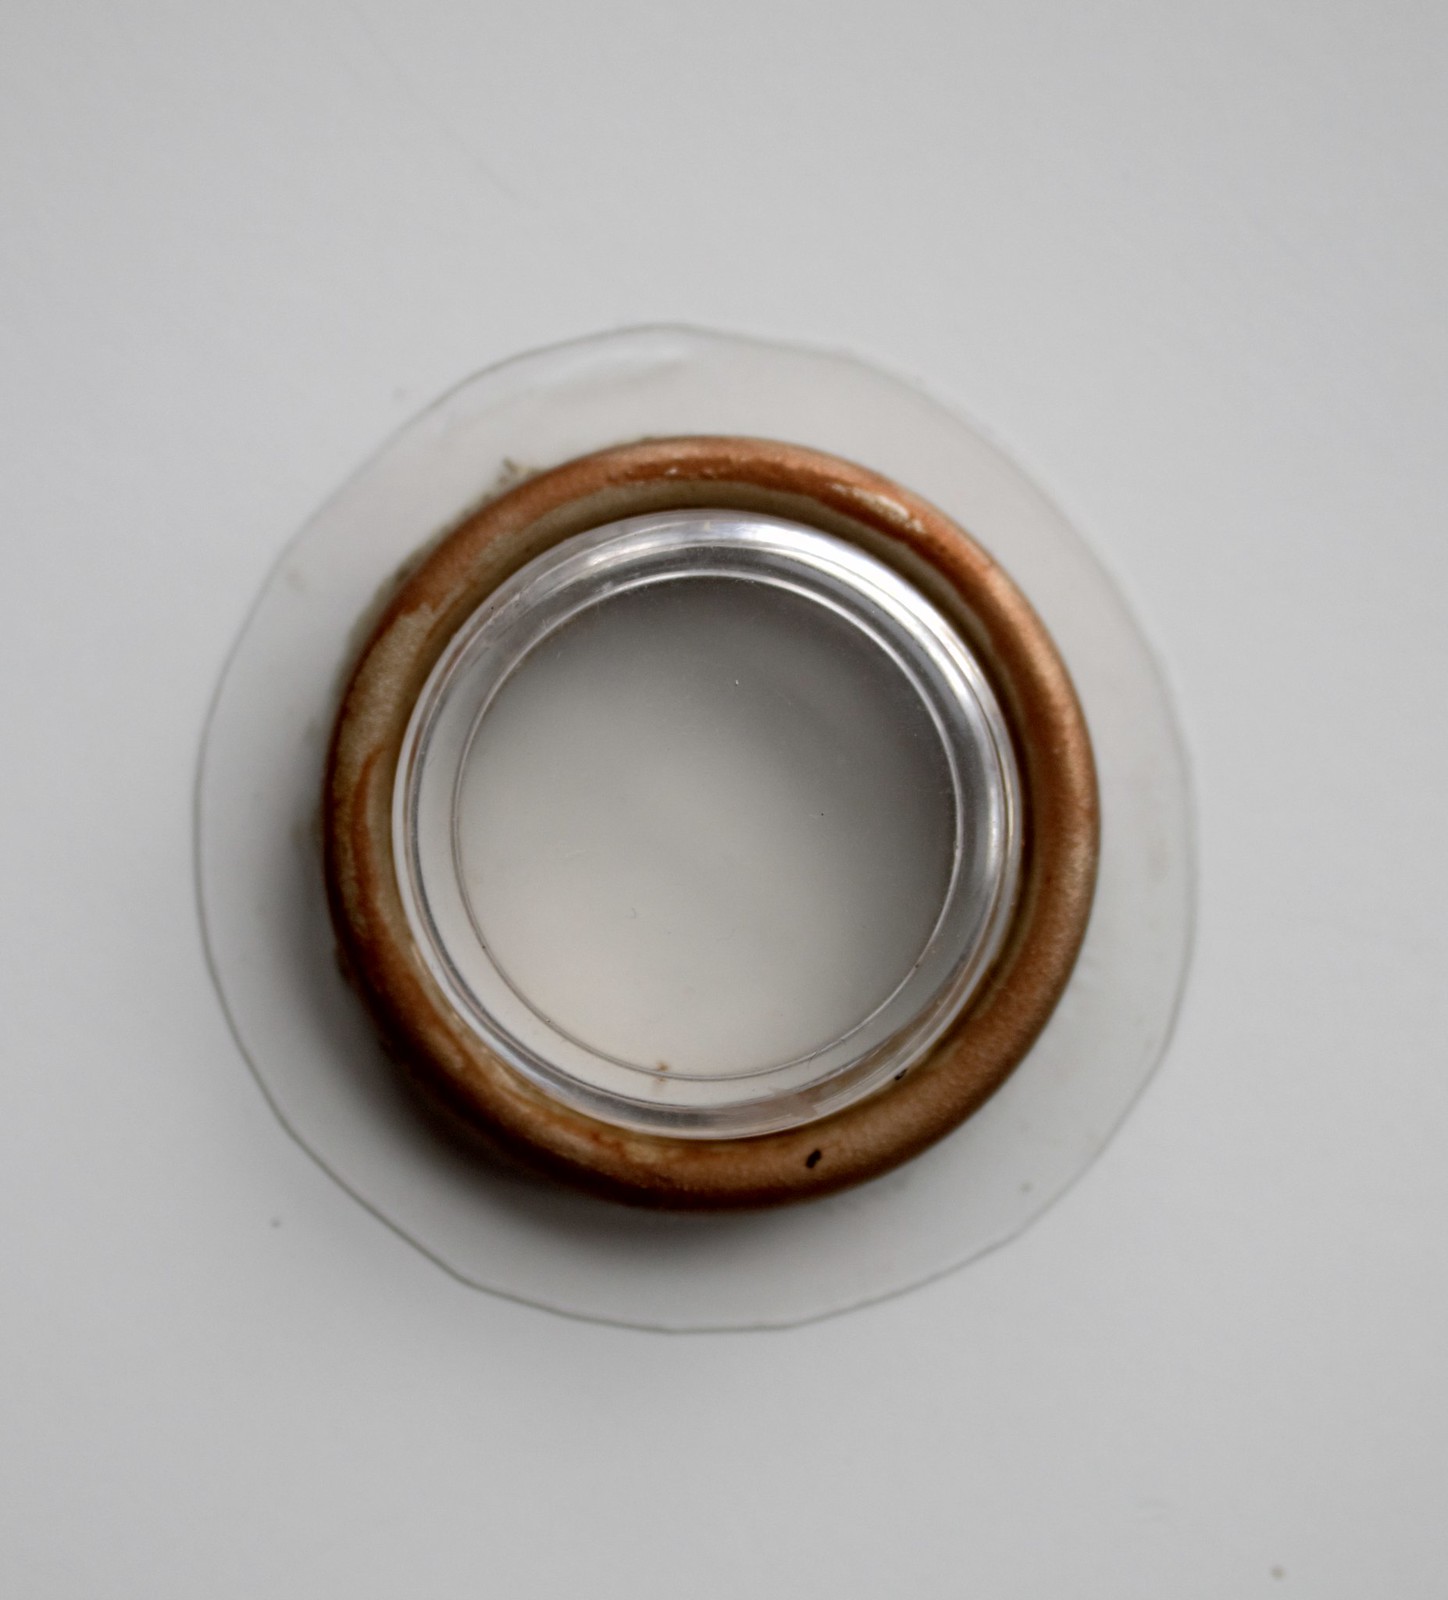
I sprayed the black rim from the zoom lens with the same gold paint as the other parts and then started to work on the finish, darkening and weathering the gold paint. I started off applying and then immediately wiping off a strong coffee solution to dirty and weather the surface of the paint. You can see Adam Savage using the technique at the end of this Tested video. In short, I just made up a strong instant coffee solution, applied a thick layer to the surface using a paper towel and then immediately wiped it off again with a dry paper towel. This causes the coffee to sink into any little cracks/edges/recesses etc and leave a dirty and old-looking finish.
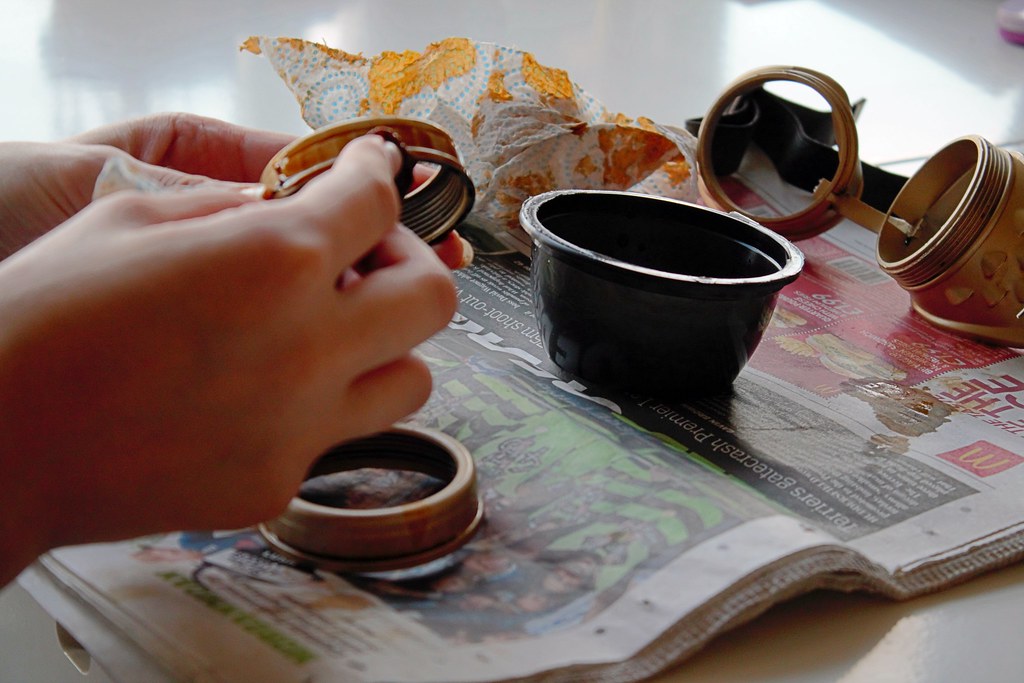
After a few layers of coffee I decided that the effect of the coffee was a bit too subtle, so I hit it with a layer of reddish brown acrylic wash paint (I used Citadel Reikland Fleshshade) and left it to dry for a few minutes before decided it was too much. I ended up taking the coffee solution again to wipe away some of the acrylic paint to tone it back down again.
This left me with the following weathered/corroded looking finish with the bright gold having been darkened quite nicely to a much more brassy colour.
Last of all, I glued my zoom lens together:
So, that's it! Drab to pretty fab, if I do say so myself. I may add to these in the future but for now I'm pretty happy with how they came out, especially as a first attempt.
I'll be back soon with another installation of Steampunk Saturdays. Leave me a comment if you have enjoyed this post and let me know what other steampunk things you'd like to see in the future!


2 comments
These are very cool.
ReplyDeleteI'm not into steampunk myself, but I always love seeing the outfits that others come up with!
I love this diy! These would have been perfect for Secret Garden Party but I'll definitely keep this post on mind for future festivals 👌🏻 Kat x
ReplyDeleteWww.Shesagentry.Com