
DIY Vintage-inspired Room Decor for Rental Homes | Pixers.com
Disclaimer: The items featured in this post were provided free of charge in exchange for a blog post by Pixers.uk. All opinions are my own.
Click here to read my full disclosure policy.
Hello everyone! Today I have a slightly different post to usual, but I am very excited to show you. Over the past few weeks I have been working on some vintage-inspired home decor with a company called Pixers, who sell a variety of different items from posters and wall canvasses through to wallpaper and fridge stickers. I picked out several different items to help make my uninspiring rental flat look a bit more vintage, and I'm going to show you some before and after photos as well as talk you through my experience with some of the items. I also have a lovely 40% discount code if you'd like to get yourself some goodies from Pixers so make sure you read all the way to the end to find the details on that.
Because I live in a rented flat, all the items I chose had to be suitably temporary (I couldn't choose a wallpaper, for example, because I am not allowed to change the colour of the walls and also I don't plan on living here long-term). Fortunately Pixers has plenty of options that can help to make a boring rental home look much nicer, without the need to make any major changes. If you don't live in a rental home and you can completely control you own interior design, then of course any of these options would still be suitable, and Pixers does also sell some wonderful designs of wallpaper and wall vinyls if you're able to go for something a bit more permanent.
Of course I've chosen all vintage-inspired designs (of which there are plenty available), but Pixers has literally thousands of designs across their different ranges so there is something to suit every taste. In addition, many of their designs run throughout their ranges (for example you can have the same design on wall murals and a table veneer and a fridge sticker... etc) so you can choose to keep a theme running across several different items if you wish.
So let's have a look at the items I chose and what I did with them.
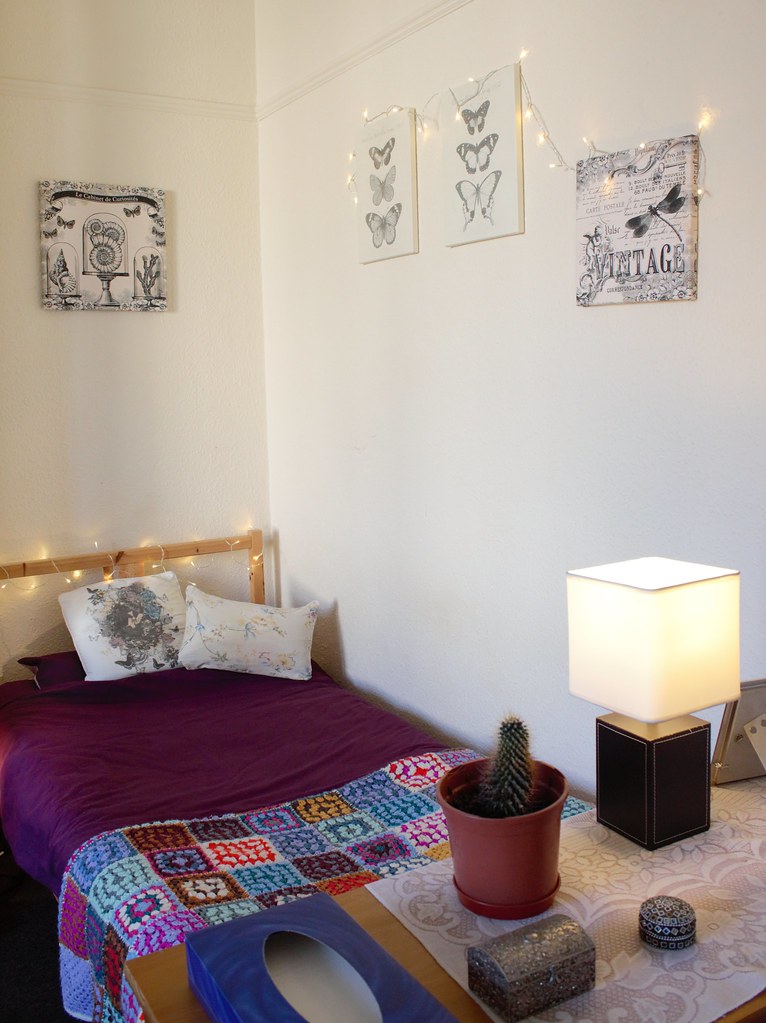
First of all, I picked out some pretty antique-style wall canvasses to help decorate the bedroom area of my studio. Here is the before and after look at the area:
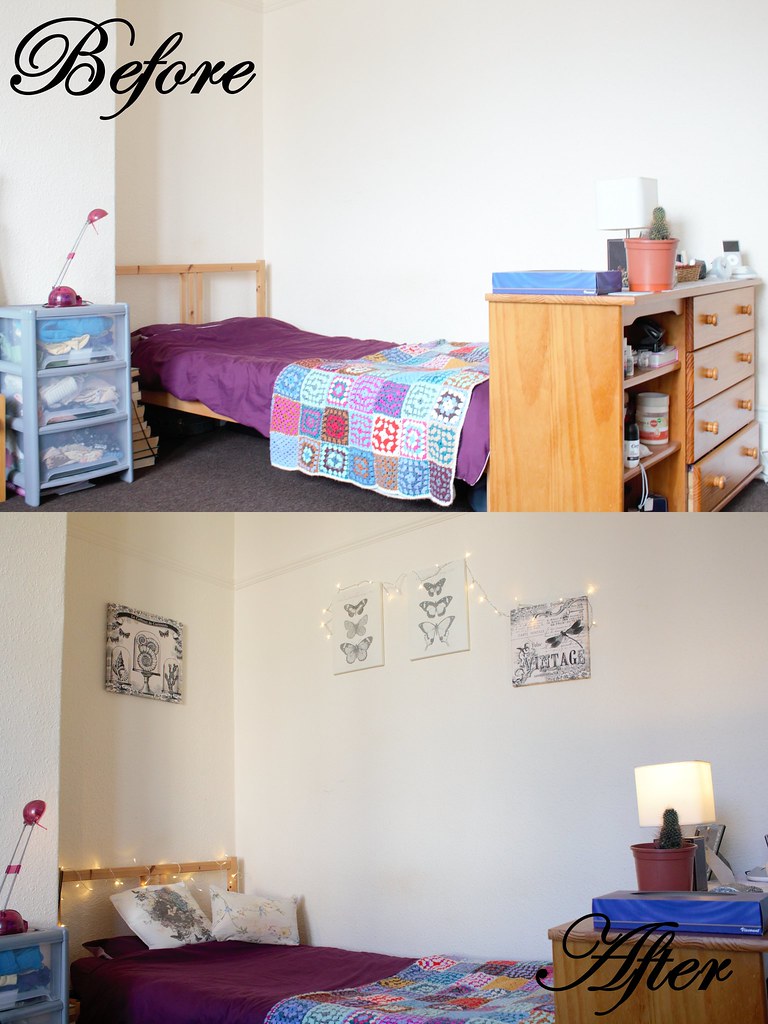
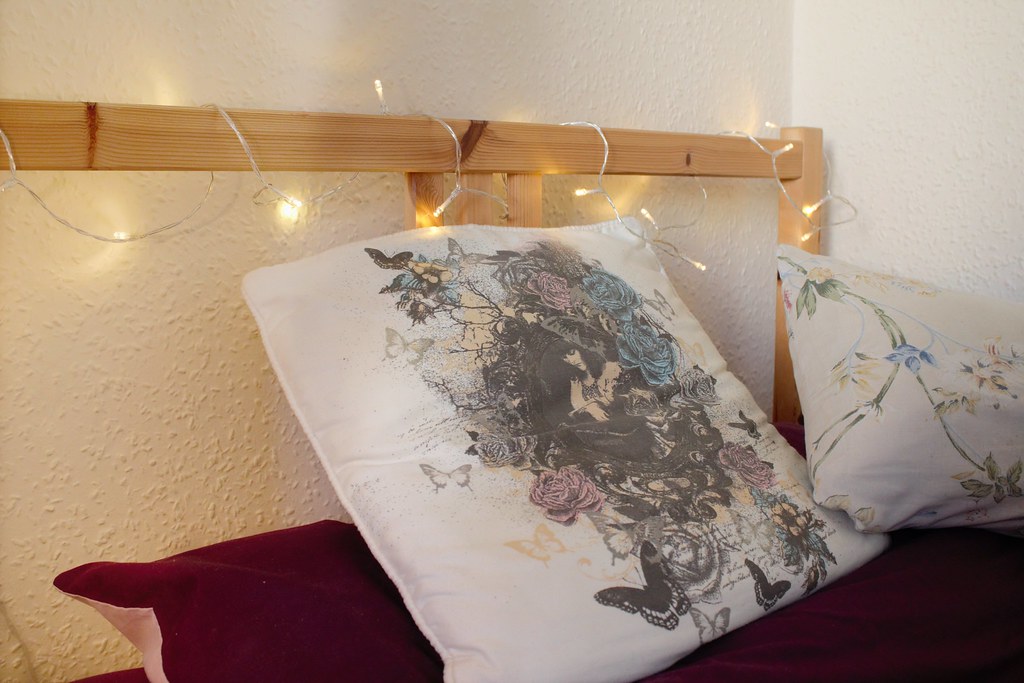
Let's take a closer look at the details.
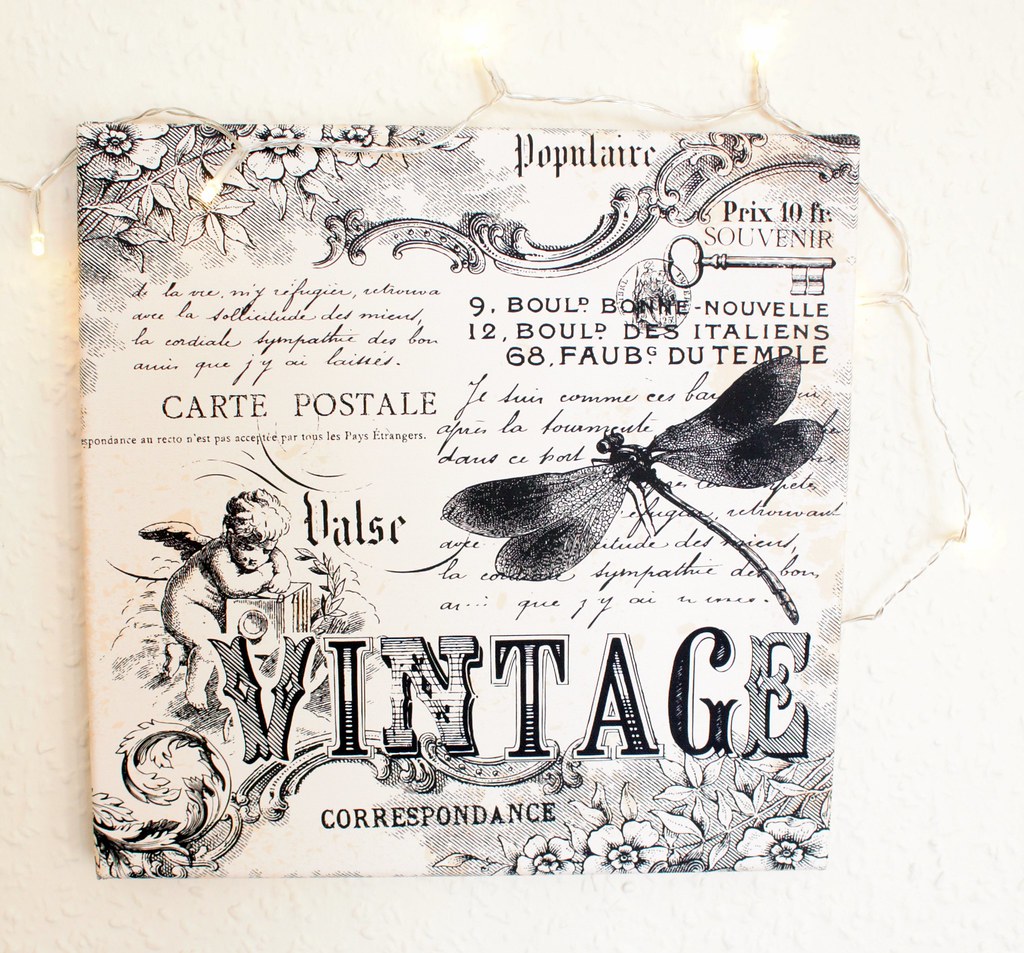
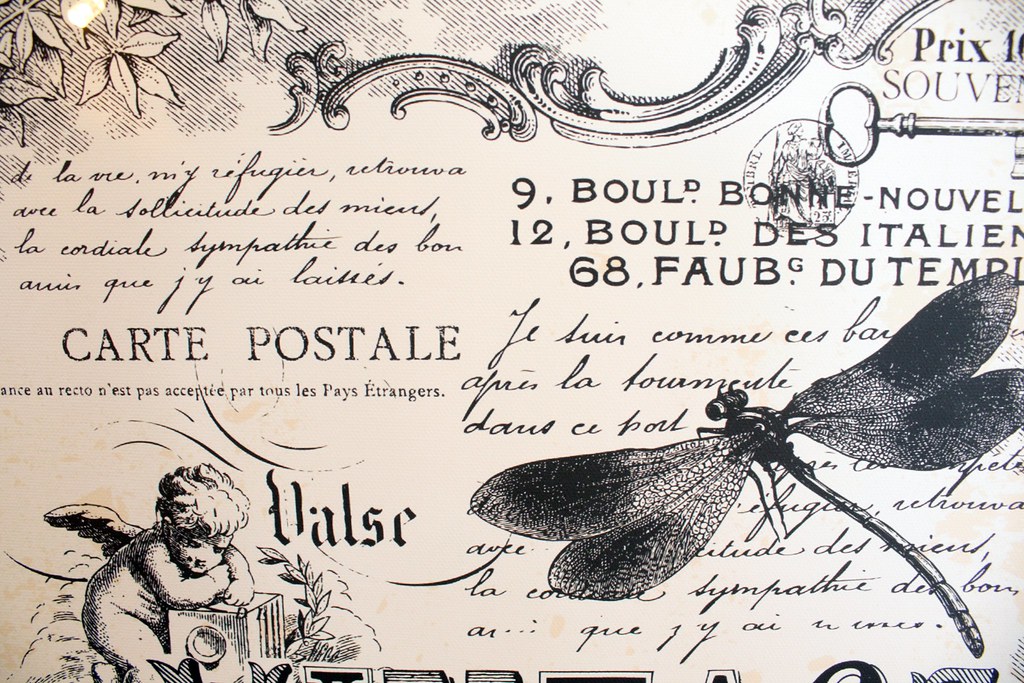
Before adding the items from Pixers, I already had a little nod to vintage style through the crocheted blanket that I use in the winter. To add to this, I chose two of the wall canvasses from Pixers to mix-and-match with some similarly vintage-inspired canvasses I already owned but had never bothered to put up since moving into this flat. I really liked the collage style of the "Vintage" canvas, and it features a dragonfly which is very appropriate for me given my interest in insects.
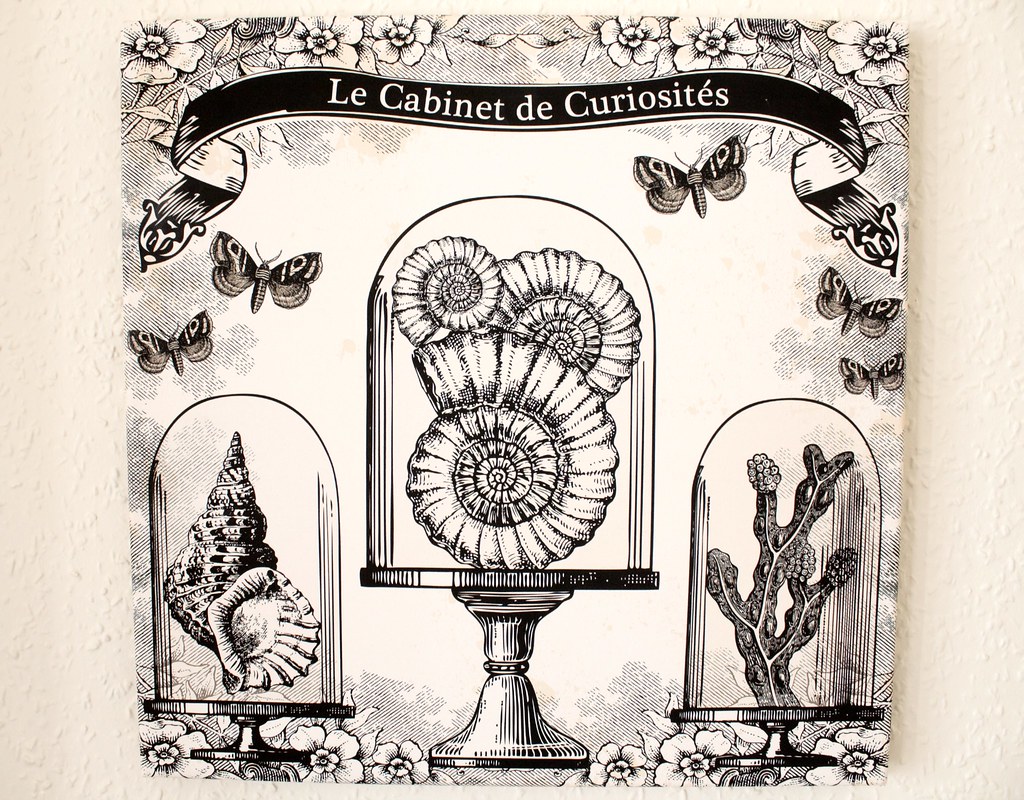
My second canvas of choice was the "Le Cabinet de Curiosités" print featuring some unusual items in bell jars and some scattered butterflies. Again I liked the antique style, but also the museum feel of the print was just perfect for me as I have done quite a lot of work in museums and even met my fiancé in one. I knew he would also like the print, so this one was a good choice for something we can hang up in our flat when we finally manage to move in together.
For the finishing touches I tidied and rearranged the items on my dresser and added some throw cushions and fairy lights for a cosy feel.
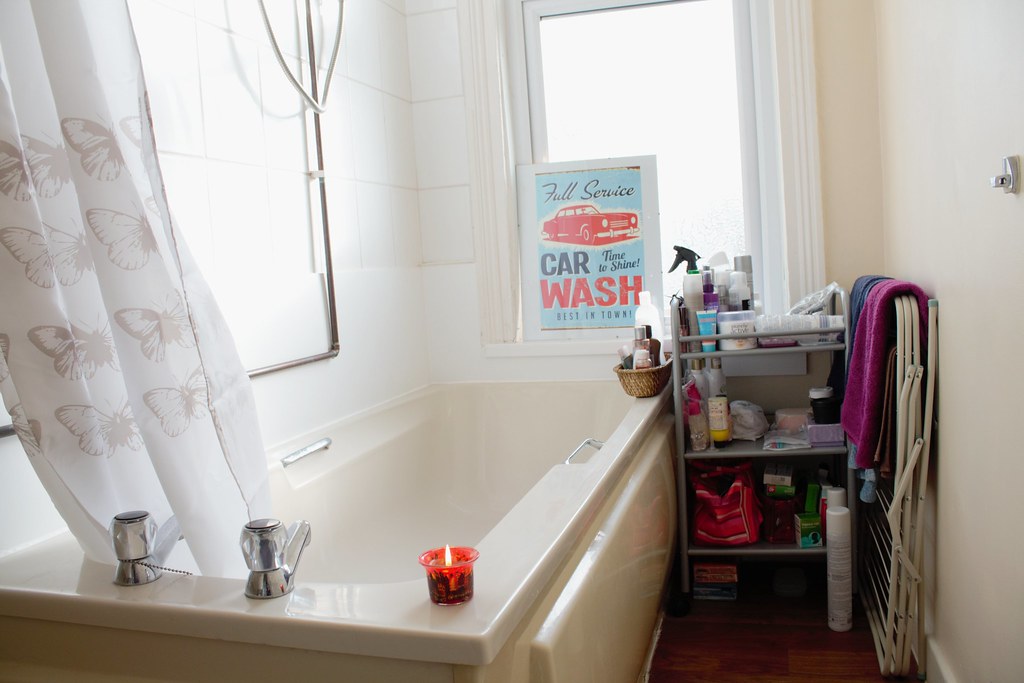
Next I did some work on my bathroom. Like the rest of the flat, the bathroom was very plain and quite clinical (and features and ancient and disgusting snot-green coloured bathroom suite) so I was very pleased to be able to make it look more attractive and a bit more vintage by adding some carefully chosen accessories.
First, here's the before and after comparison:
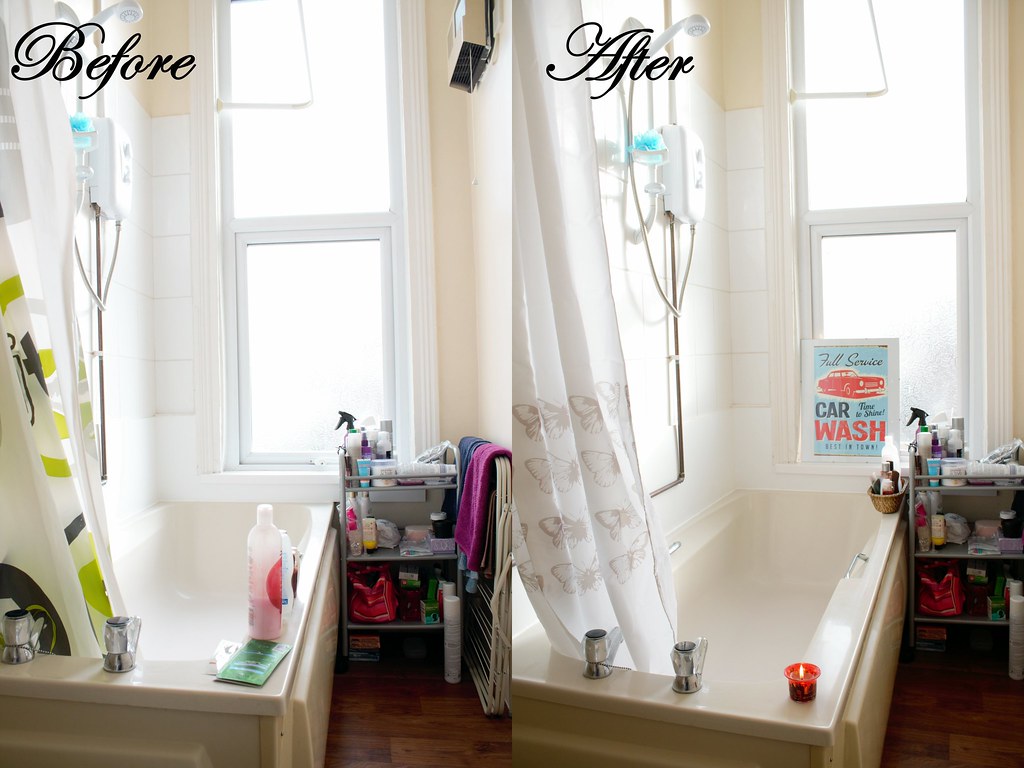
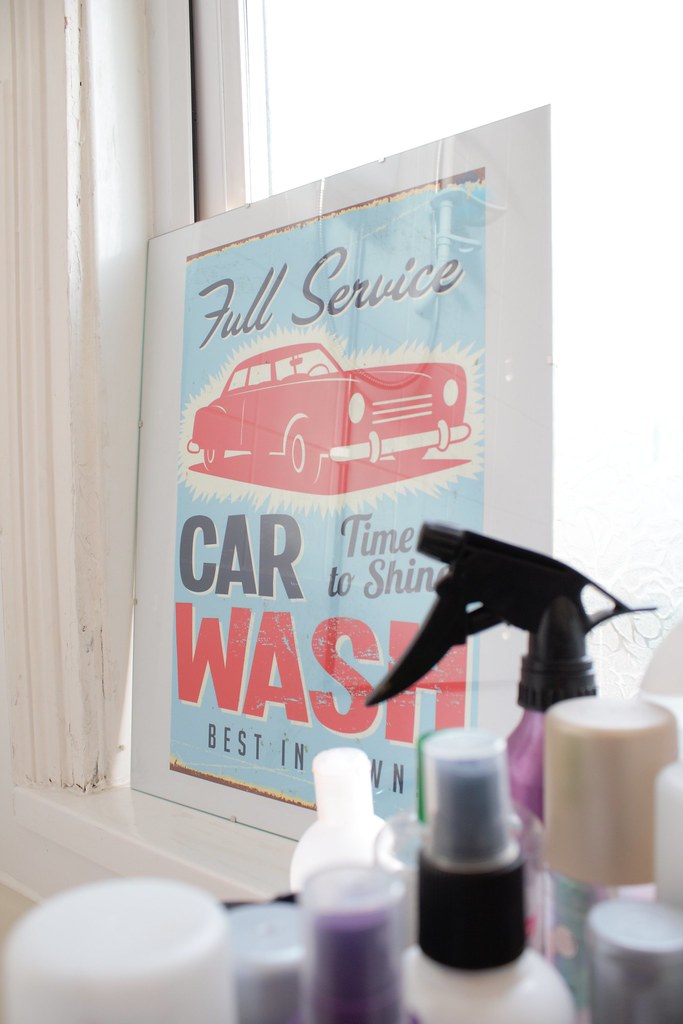
I chose a cool retro car wash poster from Pixers to kick things off, as it appealed to my silly sense of humour to have a car wash poster in the bathroom. This particular poster was unframed (although Pixers do sell framed posters as well) so I bought a plain glass frame to help protect it and to make it rigid so I could choose to either stand it on a surface or hang it on the wall.
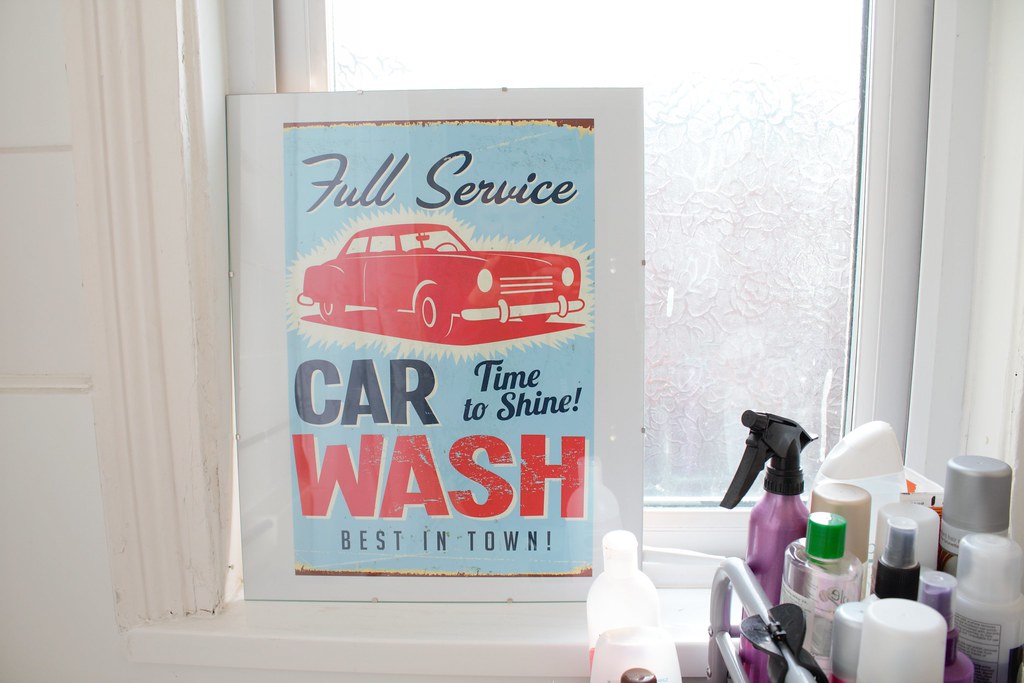
I propped it up in the window for these photos, although I might hang it on the wall opposite the bath in the future. It was a difficult size to find a frame for so I ultimately ended up with one that was quite large in order to accommodate the dimensions, but I'm sure a picture framer could provide a custom frame to fit it better. It was very difficult to choose a design as Pixers sell several different retro posters including a lot of vintage advertisements for car washes and other businesses such as diners and cinemas. Ultimately I decided a car wash design was the best for what I wanted, and I eventually settled on this one.
To finish off I swapped out the ugly plastic shower curtain for a fabric one with a pretty sepia-coloured butterfly design, and I added a red candle to match the red in the poster. Lastly, I tidied all of my bottles of shampoo and shower gel etc into a little wicker shower caddy which looks much better than having them all loose.
Lastly I picked out some nifty things for my dining/work area. The first item I chose was a laptop sticker with a gorgeous Edwardian little girl on it.
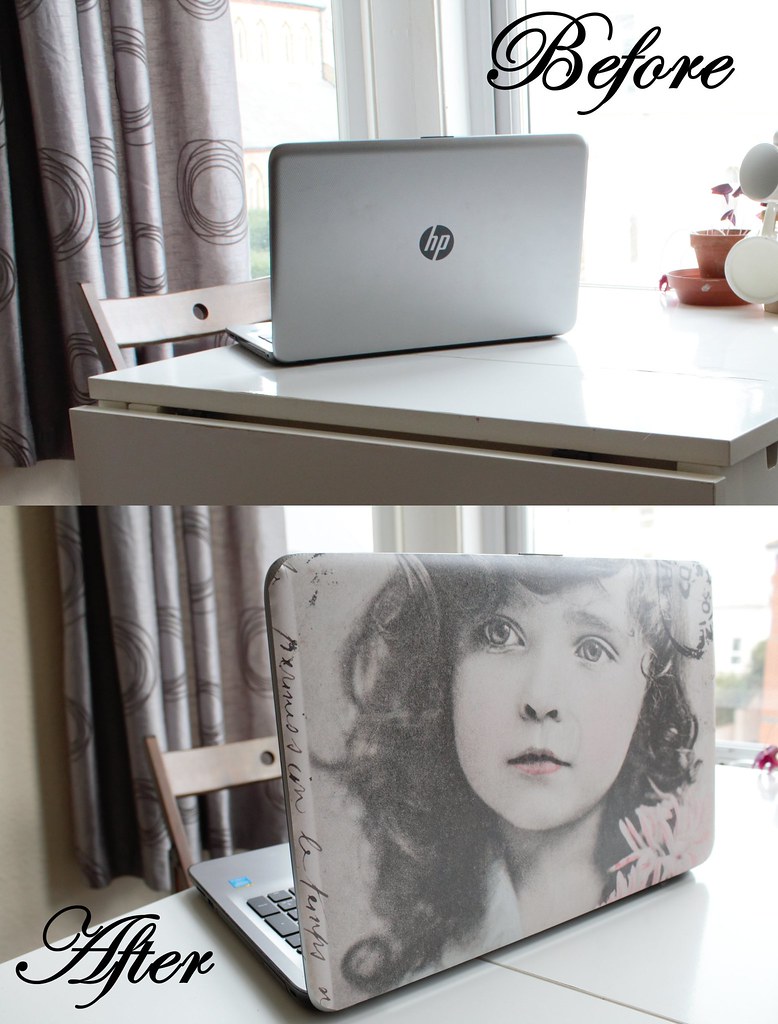
Overall I'm really happy with how this looks; the little girl is absolutely adorable. I will say it was a bit difficult cutting the corners of the sticker to shape, as the vinyl was square but my laptop has rounded corners. I tackled this by sticking the vinyl on first and then cutting it to shape with a box cutter around the corners, which worked pretty well but wasn't perfect. So far I haven't been able to come up with a better idea as it wasn't really possible to trace round the corners before sticking the vinyl on, as the case of the laptop is also curved at the edges. You can also slightly see the HP symbol peeking through the little girl's face in the centre of the sticker. Nonetheless, I think it still looks really great and she definitely is super cute.
Now for the biggest project I undertook - my table. I have a poor battered old Ikea table that serves as my dining table/work desk and which originally came from my old flat when my landlady sold the building. I had been thinking for a while about how I could somehow upcycle or tidy up the table so I could keep it going a bit longer, but I couldn't decide whether to paint it or decoupage it or something else entirely. When I saw that Pixers did table veneers, that completely made up my mind for me and I decided to paint the frame and use one of the vinyls for the top. I chose an amazing atomic print design, which I thought would look chic and reasonably neutral as I don't know what the decor will be like in any future flats I might move into.
Before we get to the details, here's a look at the before and after shots:
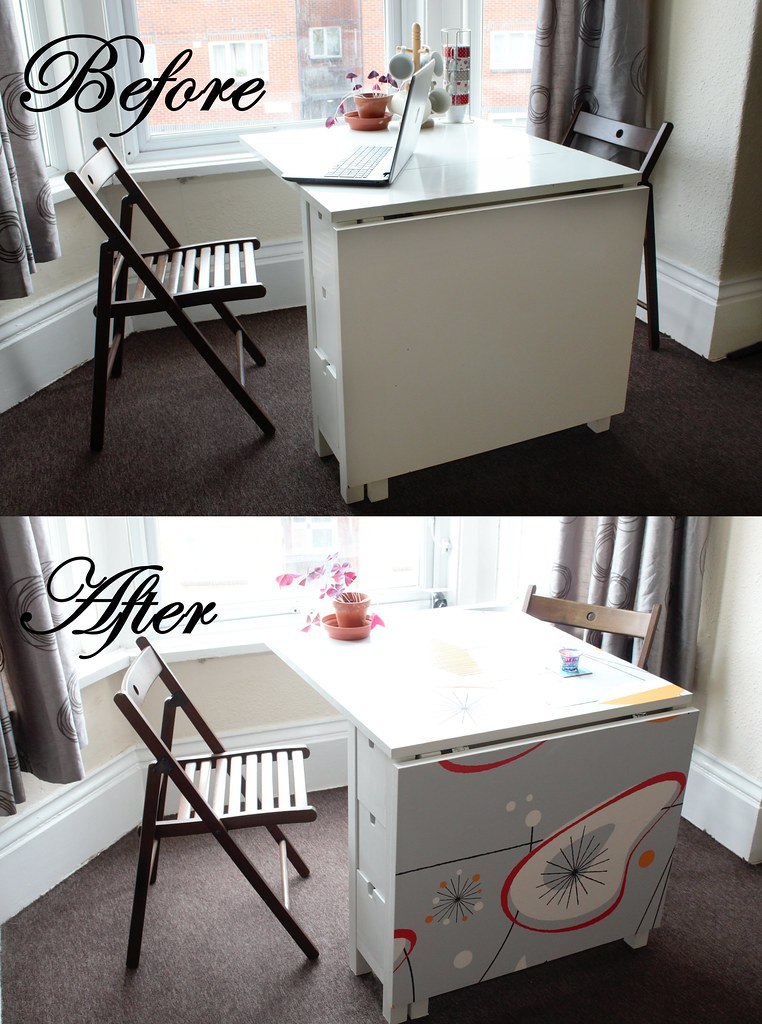
I started off by painting the drawers and legs etc of the table grey using a chalk furniture paint. This was incredibly time consuming as I had to wait for certain surfaces to dry before I could paint other surfaces, and I was supposed to leave 4 hours in between coats according to the instructions. Since the table needed 2-3 coats to get a fully opaque streak-free coverage, this took a long time to achieve. I don't want to make this blog post about the painting process, but I also noticed that the paint was very prone to getting brush strokes in it, and it seems to scratch easily so I'm not sure how long it will last.
When I had painted the table all over (except for the tabletop) I started to apply the vinyl. This was a difficult process even though I followed the instructions on the website. I struggled to get the sheet straight and then ended up with loads of air bubbles in it (it's similar to using that sticky book covering stuff that I always used to put on my exercise books when I was at school). Then, completely through my own clumsiness, I managed to damage the vinyl in a couple of places when trying to get the air bubbles out, and again when I was slicing down between the leaves of the table.
All that said, there is nothing at all wrong with the product - I just think it would be much easier to use if:
1) you had a second person to help out
2) you had a smaller table to work with
and 3) your table was all in one piece and didn't have leaves
Overall I'd really recommend this as a quick and simple (if not necessarily easy) way to customise or upcycle a table, especially if you're a bit better than I am at this DIY thing and are less likely to damage it when applying it to the table.
Since the table's in a difficult position to photograph, here's a slightly darker image just so you can get a better look at the overall pattern:
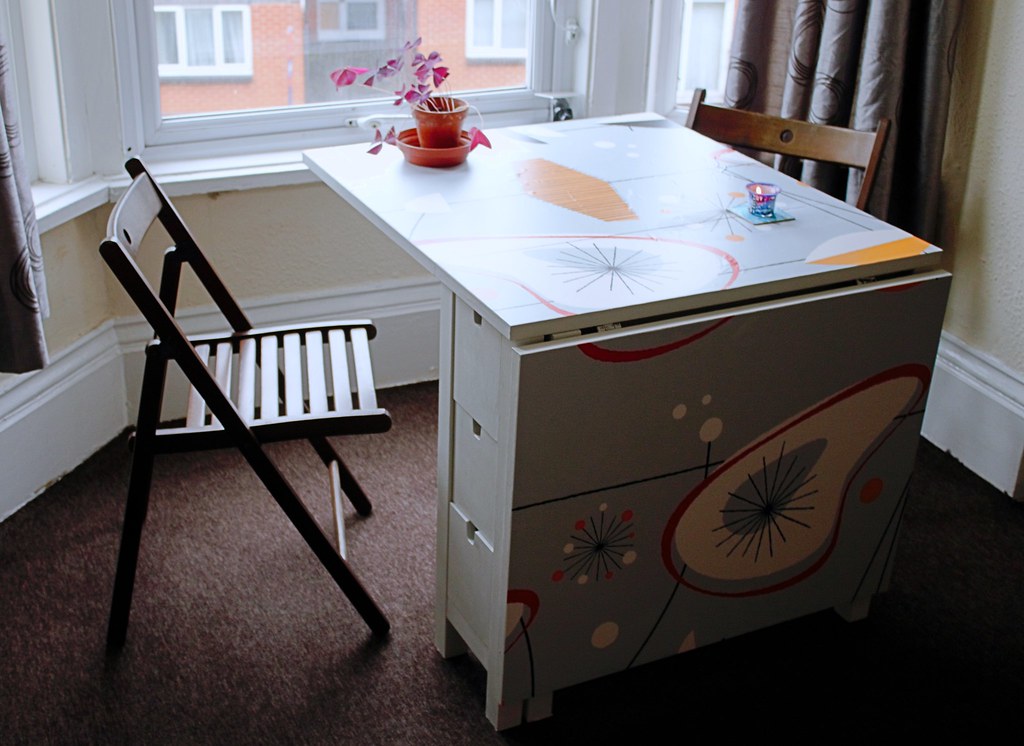
Honestly I really love this pattern and the colour scheme, and it would also be an easy way of disguising a more modern table as an older one, if you're someone who has a lot of mid-century and atomic homeware.
I think I might also paint the chairs to match, as I have plenty of paint left over and it will be nice to have a matching set.
---------------------
As I mentioned at the beginning, I also have a 40% discount code if you'd like to order anything for yourself from Pixers. All you have to do is enter HELEN when prompted at the checkout.
That's all I have for today's post but please let me know in the comments what you think of my efforts and if you have any other ideas for retro home decor suitable for rental homes.
Let's get social!


0 comments